COMPLETE GUIDE TO SETTING UP PARENTAL CONTROLS ON YOUR HOME WI-FI: Protect Your Kids Online
Introduction
 |
| Setting up parental controls on your home Wi-Fi |
Step-by-Step Instructions
Step 1: Access Your Router’s Parental Controls Settings
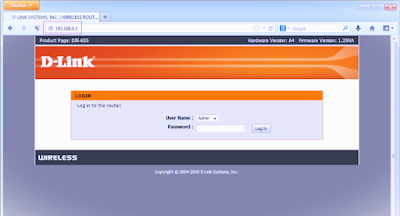
Log into your router’s settings
Log into your router’s settings by typing the router’s IP address into your browser. Once you’re in, navigate to the Parental Controls section.Step 2: Create User Profiles
Assign different devices to each profile
Most modern routers allow you to create user profiles, where you can assign different devices to each profile. This is especially useful if you have multiple children and want to tailor the restrictions for each one.Step 3: Set Time Restrictions
Limit when your kids can access the internet
With parental controls, you can limit when your kids can access the internet. Set time limits or schedules for each device or user profile, ensuring they don’t spend too much time online, especially late at night.Step 4: Block Inappropriate Websites
Use pre-configured filters to block adult content
Many routers with parental control features allow you to block access to specific websites. You can use pre-configured filters to block adult content, or manually enter the websites you want to restrict.Step 5: Monitor Activity
Keep track of websites and apps accessed
Some routers provide an activity log where you can monitor the websites and apps your children are accessing. This is a useful tool for keeping track of their online behavior and ensuring they stay safe.Conclusion
By following this guide, you’ve set up parental controls on your home network, giving you more control over your kids’ online activities. This not only protects them from harmful content but also helps establish healthy internet usage habits.
Call to Action
Need help with other network security features? Check out our VPN Setup Guide for more ways to protect your home network and ensure online privacy.


Comments
Post a Comment